Wednesday, November 16, 2011

You can do them both ways...

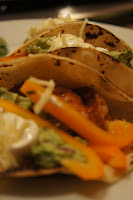
Hey!  Get your mind out of the gutter.  I'm talking about food here!  More specifically, I'm talking about stuffed peppers.  They're a pretty easy dish to make, but I always forget that I have them in my rotation.  A few weeks ago, I bought some ground turkey and was feeling a little ho-hum about what I would make.  I think the inspiration came to me as I was flipping through a cookbook; I couldn't stand the thought of making yet another meat sauce for spaghetti, and my thoughts turned to the Mexican flavors I love.  So I thought some stuffed peppers would be a perfect way to combine boring ground turkey and delicious Mexican spices!

I've seen a couple of different stuffed pepper recipes; some can take quite a while, particularly if you stuff the peppers with raw meat and bake them in the oven.  But I have a quick recipe, too, where you cook the meat filling in a skillet and then add the stuffing to the pepper.  I like the baked version because it allows the pepper to sweeten a little bit and the flavors seem to come together a bit better.  But, after work, do you really want to wait over an hour for dinner to be ready?  Yeah, I didn't think so.  So, here you go... Stuffed Peppers Two Ways


Ingredients
  • 1 pound ground turkey breast
  • 4 bell peppers
  • 1 cup cooked brown rice
  • 1/2 cup salsa, or 1/2 cup diced tomatoes and 1 T. chili powder
  • 1 cup shredded reduced fat cheddar cheese
Instructions:  The Long Way
  1. Preheat the oven to 400.  Spray a pie plate or other baking dish with cooking spray.  Cut the top off of the peppers (about 1/4 to 1/2 inch) and remove seeds. Cut a sliver off of the bottom of each pepper so that it can stand in the baking dish.*
  2. In a mixing bowl, combine the ground turkey, rice, salsa (or tomatoes and chili powder).  Divide the mixture evenly among all peppers.
  3. Bake the peppers for 45 minutes to 1 hour, using a meat thermometer to test doneness (should be 165 degrees).  Sprinkle about 1/4 cup shredded cheese over the top of each pepper and then place under the broiler until the cheese melts. 
Instructions:  The Short Way
  1. Heat a skillet sprayed with cooking spray.  When hot, add the ground turkey and saute, breaking up the meat, until cooked through.  Add the salsa (or tomatoes and chili powder) and rice, stir to combine, and simmer until heated through.
  2. While the turkey is cooking, prepare the peppers as you would in step 1 of the Long Way, and place in a microwave-safe baking dish.  Cover the baking dish with plastic wrap and microwave for 3 minutes, or until the peppers are tender - not mushy soft, just enough that you could cut through easily with a fork or regular knife.
  3. When the peppers are cooked, drain off any excess water and fill the peppers with the turkey mixture.  Top with cheese and cook under the broiler until the cheese melts.
  4. See?  Isn't that faster?
*One note about the pepper prep, is you can cut them in half lenghtwise or leave them whole.  Up to you...

Monday, October 31, 2011

A Halloween Riddle


So, my sister makes these amazing sugar cookies...amazing cookies in general, actually. This past weekend she brought some pumpkin chocolate chip cookies to a friend's house. They were delicious! And you know how I love pumpkin... So it got me thinking: could you substitute pumpkin for the butter in your classic chocolate chip recipe, and still get a yummy cookie? I decided to give it a go. Using the classic chocolate chip recipe (the Toll House recipe you'll find on nearly every bag of chocolate chips), I replaced the 1 cup of butter with 1 cup of pumpkin puree. I knew I'd likely have to compensate for what was likely to be a "runny" texture, so started with one egg instead of two. Then I added in the dry ingredients. With the default 2 1/4 cups of flour, the batter still seemed a bit thin. I added one more 1/4 cup of flour, and that seemed to do the trick.

The other substitutions / additions I made are as follows:


  • Replace brown sugar with sucanat (raw, raw sugar with retained molasses content)


  • Replace white sugar with evaporated cane juice (less processing)


  • Replace white flour with whole wheat pastry flour


  • Add 1 t. cinnamon and 1/2 t. ginger
(PS I'm handing these out to grown-ups that come trick-or-treating with their kids, but only those who are friends of mine ;-). I'll let you know what they think!)

The dough wasn't like a typical chocolate chip cookie dough, it was a bit sticky. So the tip I have for you is to use parchment paper on the cookie sheets, or spray with cooking spray before putting the dough on the cookie sheets. The cookies baked at 350 for 12-14 minutes and have a nice cake-y texture. As Gram would say, "the taste is there," and they have passed E's taste test (though he's hardly picky...). So I would say that to answer the Halloween Riddle, "YES you can substitute pumpkin for butter in chocolate chip cookies. But you can't call them proper chocolate chip cookies anymore, they are their own thing."

Enjoy...and happy Halloween!!

Pumpkin Chocolate Chip Cookies
(makes 36-48 cookies, depending on how stingy you are with the dough)

1 c. pumpkin puree
3/4 c. sucanat or brown sugar
3/4 c. evaporated cane juice
1 egg
1 t. vanilla
1 t. baking soda
1 t. salt
1 t. cinnamon
1/2 t. ground ginger
2 1/2 c. whole wheat pastry flour
9 oz. chocolate chips (semi-sweet, dark, or milk chocolate... up to you!)


  1. Preheat oven to 350. Line cookie sheets with parchment paper or spray with cooking spray.


  2. In a large mixing bowl, or in the bowl of an electric mixer, combine pumpkin puree, both sugars, egg, and vanilla, and mix on low to medium speed until well blended.


  3. Add baking soda, salt, spices, and flour and mix until combined.


  4. Add the chocolate chips and mix just until incorporated.


  5. Drop cookie dough by rounded tablespoons onto the prepared cookie sheets - depending on how big or small you make them, you should get 36-48 cookies. (Nutrition information is provided based on a 36-cookie batch)


  6. Bake for 12-14 minutes; cookies won't spread out much, but they will rise and get golden brown around the edges. Let cool slightly on the cookie sheet before moving to a cooling rack.
Nutrition information (per cookie, 36 cookies per batch): 98 calories, 2 g fat, 20 g carbs, 2 g protein, 1 g fiber, 2 g sodium

Monday, October 24, 2011

Got maple?

OK, so anybody who's not completely tuned me out when I've talked about my fall cooking and baking escapades knows that maple syrup (yes, the real stuff) is a big part of my ingredient go-to list. Maple syrup is sooo good for you, and you don't need a lot of it. You really add fewer calories cooking with maple syrup than when you add sugar. So there.

So here's a recipe that was inspired by a Cook's Illustrated recipe for perfecting pan-roasted chicken, together with my love of maple syrup.

Maple Dijon Pork Tenderloin (or chicken breasts)


Ingredients
1 pork tenderloin or boneless, skinless chicken breasts (between 1-1.5 pounds)
Olive oil (around 1T. or so)
1 T. dijon mustard
2-3 T. pure maple syrup
1 -2 t. bouquet garni or poultry seasoning (if you don't have either, then use some combination of sage, thyme, marjoram and similar herbs)
1 medium apple, sliced

Directions
1. Heat the oven to 400F. Remove the pork (or chicken) from its packaging and place on a plate or paper towel. Sprinkle with salt and herbs, ensuring to cover all sides.
2. Heat a cast iron skillet, or another similarly stove-to-oven appropriate pan, and when hot add the olive oil and swirl to coat.
3. When the oil has heated up just a smidge, place the pork (or chicken) in the pan - watch the heat and dial it back if it seems that the pan is too hot. After 5 minutes, turn over (in the case of pork you will make 3 rotations to cover the whole surface). The side that just cooked should be a bit golden - if it's darker then cook the other side using less time. (This step is searing the meat, all the better to keep the juices inside...)
4. While the pork (or chicken) is cooking, combine the Dijon mustard and maple syrup in a small bowl. After you've turned the pork (or chicken) the first time, baste the cooked side with the mustard-maple syrup mixture. Repeat after you turn the meat over again.
5. Once all sides of the meat have seen the "hot" side of the pan, throw the apple slices into the pan, turn off your burner, and place the pan into the oven. Make sure that you have basted the pork (or chicken) one last time before placing into the oven.
6. Cook for an additional 15-25 minutes (will really depend on the thickness of the meat) until cooked - use a meat thermometer to test for doneness (pork should be 160-165 degrees and chicken should be 165 degrees)
7. Let it rest so the juices can redistribute. Serve with mashed potatoes, butternut squash, Brussels sprouts, Sauerkraut, applesauce, etc. Slice and enjoy!

Tuesday, September 27, 2011

On a pumpkin kick...

OK, so it's officially Fall now, right? Right. Ignore the humidity and ignore the fact that I shouldn't have worn those knee-high boots today because it was too. damn. hot.

I WANT PUMPKIN. In everything. In my muffins, in my oatmeal, in my chili, in my beer, and in my smoothie. Yes, that's right - in my smoothie. So here's a little recipe I've tried that is just like drinking a pumpkin pie. No joke! It's like sipping a big glass of autumn. (ooops, be careful - you spilled some autumn on your shirt!)

You should have one tomorrow... no, really - you won't regret it!

Pumpkin Smoothie (serves 1)
8 oz. unsweetened almond milk, unsweetened vanilla almond milk, or unsweetened coconut milk (you can also use dairy milk - nonfat or lowfat)
2 scoops vanilla protein powder (I use Trader Joe's vanilla whey powder, ~140 cals. per serving)
1/3 - 1/2 c. pumpkin puree
1 t. ground cinnamon
Optional: 1 T. pure maple syrup
Handful of Ice

Put all ingredients except the maple syrup into the blender and let 'er rip... the key is to let it blend long enough to ensure a smooth texture. Have a quick taste and see if you will need that maple syrup. If it tastes too "pumpkin-y" then add more cinnamon, or add the maple syrup... or just suck it up, it's good for you!

Tuesday, September 20, 2011

PS I love you

The change in season - from summer to fall - is a good reason to make a change in your day-to-day routine, to try something new and different. Rather than risk an adventurous haircut that may not work or get that tattoo you've always wanted but will no doubt regret the moment all the ink is on you, why not just try a new recipe or ingredient?

I have mentioned Penzeys Spices before as a source of great quality spices, but the thing I like most about them is the spice mixes they have. I've mentioned the Chili 3000 and Chili 9000 blends. Recently I got a free bottle of Northwoods Seasoning - a blend of coarse flake salt, paprika, black pepper, thyme, rosemary, garlic, and chipotle. This new seasoning came in handy when I wanted to make barbecue sauce but didn't feel like taking the time my go-to recipe requires. Here's the Quick BBQ Sauce recipe I came up with:

Ingredients
1/3 c. apple cider vinegar
1/4 c. bourbon
1 t. Worcestershire sauce
1 15 oz. can of organic tomato sauce
1 T. Penzeys Spices Northwoods Seasoning (or more to taste)

Directions
Combine all ingredients in a medium saucepan; bring to a simmer and cook, covered with the lid slightly ajar, for about 20-30 minutes, or until the sauce reduces slightly.

My favorite use for the BBQ sauce is on grilled pork or grilled chicken:
  • Marinade a pork tenderloin or chicken breasts in 1/4 c. soy sauce and 1 t. Northwoods Seasoning for at least one hour, as long as overnight.
  • Place the meat over indirect heat on a hot grill and baste top. Turn the meat over, and baste on the other side after you turn it. Turn it one more time onto the side with the BBQ sauce.
  • Grill until cooked through, then let the meat rest. Enjoy!
  • Pairs well with a mashed or roasted sweet potato and green beans.

What are some of your "mix-it-up" recipes and spices?

Sunday, September 18, 2011

Pumpkin Muffins with Apple Butter


Well, hello there! Fancy meeting you here... it's been a while, hasn't it? Last we saw each other, we were ready to welcome the summer. And look, already we're welcoming fall. To celebrate the great things about fall I thought a pumpkin muffin might be nice...not to mention an idea for what to do with all those apples you brought home from your apple picking trip!

These muffins are gorgeous, and only pack 169 calories a piece! The recipe follows "clean eating" principles (more on that in another post) so they're really good for you.

So, without further ado, I give you:

Pumpkin Muffins
1 1/2 cups whole wheat pastry flour
1 cup spelt flour (use ww pastry flour if you can't get this)
1 T. baking powder
1 t. baking soda
1/2 cup raw turbinado sugar or sucanat
1/2 t. salt
1 T. cinnamon
1 t. ginger
3/4 cup pumpkin puree
1 cup fat free buttermilk (lowfat is fine too...try to use a brand that doesn't have any additives like carageenan, etc.)
1/4 cup pure maple syrup (none of that Mrs. Butterworth crap!)
2 eggs
1 T. vanilla

Preheat the oven to 375 degrees F. Spray a 12-cup muffin pan with cooking spray or add muffin liners (and spray those too).

In a large mixing bowl, whisk all of the dry ingredients together. Combine the wet ingredients in a large liquid measuring cup or a medium mixing bowl. Add the wet ingredients to the dry ingredients, and stir only to combine. If you over-stir then the muffins won't rise.

Using an ice cream scoop (or a large spoon), fill each of the muffin cups with batter. Bake for 18-20 minutes, until a toothpick inserted into the muffin comes out clean. Serve with some apple butter (recipe below)

Per muffin: 169 calories, 33g carbs, 1g fat, 5g protein, 4g fiber


Slow Cooker Apple Butter
4 pounds of apples (macintosh, cortland, or any other apple) - quartered (coring and peeling optional)
3/4 cup apple cider (no sugar added)
2 cinnamon sticks
1 T. cinnamon
2 T. pure maple syrup

Put the apples into the slow cooker and add the apple cider and cinnamon. Cover and cook on low for 10 hours.

Place a food mill over a large bowl; working in batches, process the apples through the food mill. Put the apple mixture - which will be a little watery - back into the slow cooker. Add the maple syrup, stir to combine, and cook on low for 8 more hours, until it's reduced. IT WILL LOOK VERY BROWN, not unlike baby poop. But it will be delicious!

If you don't have a food mill, then I suggest coring and peeling the apples, otherwise it will be a complete chore to deal with the seeds and skins. I haven't yet figured out the "serving size" and nutritionals, but it's probably about at most 20 calories per tablespoon.

Sunday, September 11, 2011

Hey, what happened?

OK, people... don't panic. I know, I know... I haven't published a post since the end of MAY. Three months without a post. You must have thought I'd fallen off the face of the Earth. No? Barely noticed? Hm, that's odd.

So I took the summer off - big whoop. It gave me time to work on some grilling and cocktail recipes, from which you'll benefit...big time.

In fact, this weekend, I created three recipes that I'll be sharing with you soon: healthier chocolate chip cookies; "quickie" barbecue sauce; and crockpot apple butter. I'll publish these recipes soon, but just wanted to send a note to let you know "I'm baaa-aaack!" Watch this space for these recipes, and more, as we all "fall" back into our post-summer routines.

Tuesday, May 31, 2011

The Thrill of the Grill

Oh yes, people. It's grill season again. I've been under the radar again, pesky "real" job and other things getting in the way of my blog time, although I do have a few new posts up my sleeve (thanks to "Single Jen(n)s". But given that the weather has finally started to *act* like spring here in the Boston area, and it's been wonderful to grill, I thought it would be more appropriate to talk about grilling.

Grilling is a great way to cook food in a healthy way - you don't need a lot of fat, you can impart flavor without calorie-rich sauces, and you can do a lot of "one dish" meals on the grill. You can spend time in the great outdoors, with or without a cocktail in hand (your choice), and be alone with the grill and your thoughts. To me, this is heaven.

The key to getting enjoyment out of grilling is ensuring that you are prepared. You don't need to have fancy equipment, but you do have to know how to use what you've got. "Flaunt what your mama gave you," as they say. Or, for those of us who lust after super fancy Weber grills but have an aging Kenmore, "Love the one you're with." So here are the main bits that you should prepare to make sure you are making the most of your grilling experience this summer and beyond (oh, yes - I said beyond. There will be a grilled turkey this Thanksgiving!). Mind you, I have a gas grill, so most of this is being written with a bit of a gas grill bias. Yes, I know, there are purists among you who will chide me for not embracing charcoal... but what's the working girl to do? Gas is convenient and cleaner...and it's what I have right now. So - where were we - ah, yes: healthytastyeasy's Grilling Tips!
  1. Most importantly, preheat! You want to heat that grill until it's well over 500 degrees F. You can achieve this by keeping the lid closed with all burners on their highest setting, and it usually takes 10-15 minutes to get there.
  2. Clean and season your grill: The grates clean best when they are hot. Don't let the heat intimidate you from giving the grates a good scrubbin', but don't get burned either. A good grate brush with a long handle should do the trick. Once the grill is nice and hot, brush the grates. After you have taken all the food off of the grill, turn off the burners and (guess what?) brush the grates! Seasoning the grill refers to rubbing the grate with an oil-moistened paper towel, held with tongs, to help encourage a nonstick surface.
  3. Experiment with wood chips: I just bought a stainless steel wood chip smoker - it's a little box that you put your moistened wood chips in (hickory, applewood, whatever floats your boat). Soak the wood chips in water for about half an hour, drain, and put them in the box (or in an aluminum foil tin). Place the chips over one of the burners BEFORE YOU LIGHT THE GRILL and allow the smoke to develop as the grill heats up. The smoke of the wood chips can impart a really nice flavor that's calorie-free.
  4. Try new marinades and dry rubs. Here are just a few of my favorites; mix the marinade in a big zip lock bag and let the meat sit for a few hours or overnight, depending on the strength of the flavor. For steaks, especially the tougher cuts like skirt or flank, pierce the meat in several places so it absorbs the flavors of the marinade:
  • For beef or pork: 1 T. Chili powder (like Penzeys Chili 9000), chipotle powder to taste, 1 T. brown sugar, 1/4 c. low-sodium soy sauce, 12 oz. can Beck's beer
  • For chicken: Juice of 1 lemon; 8 or so fresh basil leaves, cut or torn into strips, 1 T. coarse sea salt, freshly ground black pepper
  • For beef or pork: Chili powder, garlic, maple syrup, 1 T. coarse sea salt, 12 oz. dark beer (like Guinness)
  • For beef or pork: 1 T. dijon mustard, 1 T. brown sugar or maple syrup, 1/4 c. low-sodium soy sauce, 12 oz. Beck's or Duvel beer.
  • Dry-rub variations of the above can be done (for the beef and pork marinades) by mixing the spices, salt and sugar and rubbing it on the meat, then letting it sit, refrigerated, for a few hours or overnight.

Enjoy! More recipes for marinades and grilling, and sides, to follow.

What flavors would you like to see a marinade or dry rub recipe for?

Sunday, May 8, 2011

Shrimp Guaco Tacos


A few weeks ago, a couple of friends and I started a Wednesday night dinner called "Single Jen(n)s' Night" because my one friend Jenn and I both have husbands who are normally gone all week on business travel. Our friend Laurie joins us, even though she's not a Single Jen(n) during the week. Single Jen(n)s' Night is all about taking time to catch up with friends, letting Jenn have some adult company, and giving me an outlet for my blog.

The first of these recipes I tried on my unwitting participants was shrimp tacos. I've decided to call them "Shrimp Guaco Tacos" mainly because "guaco" rhymes with "taco"... but also because the tacos were served with homemade guacamole. So this recipe really has two parts: the tacos and the guacamole.

Make the guacamole first:

Single Jen(n)'s Guacamole
Ingredients:
  • One medium ripe avocado (an avocado is ripe if it gives a bit when you squeeze it. It shouldn't be firm, and it shouldn't be squishy)
  • One lime, sliced in half the "short way" across the center
  • Fresh cilantro, about 1/4 cup, chopped
  • 1/4 of a small red onion, finely minced
  • One small tomato, seeds removed, diced
  • Salt and pepper to taste
  1. First, get the avocado flesh into a medium mixing bowl: Using a sharp chef's knife (and a lot of caution!), slice the avocado in half around the pit. Holding the avocado with both hands, twist and lift one half until it separates from the other half. The pit will remain in one half. Take the half with the pit in one hand and, with your other hand, use the blade chef's knife to whack into the pit. Twist a quarter turn, and the pit should loosen from the avocado. Now use a spoon to scoop the flesh from the avocado into the mixing bowl. Great job!
  2. Using a citrus reamer (or a fork), squeeze the juice from one of the lime halves over the avocado. Add a pinch of salt and some pepper, and mash the avocado with a fork. You don't want it to get too smooth, but you also don't want too many lumps.
  3. Add the onions, tomatoes, and cilantro to the avocado, and blend with the fork. Taste and see whether you need to add more lime juice, salt or pepper.
  4. Enjoy! Serves about four (or one, if you really, really, really like guacamole...like I do!)

Shrimp Guaco Tacos
Ingredients:
  • One pound of medium or large raw shrimp (go ahead, use jumbo or colossal if you want!), peeled and de-veined (thawed if frozen)
  • About 1 T. of Chili powder (Penzeys Spices Chili 9000 is my favorite!)
  • About 1 t. of minced garlic (fresh or dehydrated both work well)
  • Salt and pepper to taste
  • One half of a fresh lime
  • One Bell pepper, sliced into strips (I like to use yellow or orange for color)
  • Cooking spray
  • 1 package of small (6") corn tortillas (usually 12 per package). Corn tortillas have a much lower glycemic index than flour tortillas, more fiber, and fewer calories. Usually they are only about 120 calories for 2 tortillas. Use flour if you prefer!
  • Single Jen(n)'s Guacamole
  • Salsa of your choice
  • Shredded reduced fat cheddar cheese and reduced fat sour cream if you'd like
  • Fresh cilantro
  1. Ensure that the shrimp have been rinsed and patted dry. Sprinkle with salt and pepper and add the chili powder and garlic, then allow to marinate for about an hour.
  2. Heat a skillet or frying pan over medium high heat, then spray with cooking spray. Add the pepper strips, stirring frequently, until they begin to soften. Keep the peppers in the pan, moving them to the edge so that there is enough space in the center of the pan to put the shrimp.
  3. Spray the pan with more cooking spray if necessary. Add the shrimp. Cook for about 2 minutes, then turn the shrimp over to cook on the other side. They should not cook for more than about 4-5 minutes total.
  4. While the shrimp cook, if you have a gas stove, then you can do this neat trick with the corn tortillas that makes them a bit more pliable and less likely to crack in the middle. Turn on a burner to about medium. **USING TONGS**, place a tortilla directly on the burner. After about 10 seconds, AGAIN using tongs, turn the tortilla over. Do this repeatedly until the tortilla is a little bit blackened, and warmed all the way through. Be sure not to leave the tortillas unattended, they can catch fire (and have in my presence!).
  5. Once they've finished cooking, give the shrimp and peppers a good stir to ensure they are well seasoned. Squeeze the lime over the shrimp and peppers, and stir to distribute the lime juice.
  6. Each serving is 2-3 tacos: each taco is a tortilla with a scoop of the shrimp and pepper mixture, topped with a bit of guac, salsa, and if you would like, sour cream and cheese. Fresh cilantro is another nice touch.
  7. Enjoy!

She's baaaaaack!

OK, so it's been a while since I've posted. Nearly two months, as a matter of fact.

For the handful of you who grew addicted to my entries, I'm sorry that my absence has been so long. I lost my grandmother about a week after my last post, and suffice it to say that I've not really felt "inspired" for a while. Despite that, I did manage a couple of recipes that I tested on friends - and took pictures - so I'm going to try and get caught up.

Gram was a huge source of inspiration to me - she exhibited a passion for living and having fun that has made a big contribution to who I am today. So in her honor, I'm getting back to something that feel passionate about.

Here we go!

Sunday, March 20, 2011

The Leprechauns are Marching...

OK, so I'm a little late for a proper St. Patrick's Day post, but there are lots of St. Paddy's parades today, so I figured I could still post this recipe.

Growing up, as the daughter of a kindergarten teacher, every holiday was a big deal. We celebrated every holiday - major or minor - and Mom made a big deal of decorating and making special foods in honor of the current holiday. I remember coming down for breakfast before school on Valentine's Day and St. Patrick's Day, and Mom would have the table set with all kinds of decorations and a themed breakfast. It really was fun and now, as a grown-up, not even having kids of my own, I wonder how she found the time and energy to do it!

For St. Patrick's Day, mom would make this amazing Irish Scawn Bread, with raisins and this crisp sugary topping... Although it's so delicious (especially toasted and drenched in butter), it's actually quite low fat. So - I thought it appropriate to include it in healthy.tasty.easy!

This bread is so delicious it's easy to keep slicing a piece...so I decided to make muffins this year instead of a loaf, an attempt at portion control. The recipe makes 24 muffins (or two loaves) so it's up to you how to make them! Although this is an "Irish" recipe it tastes just as good in October as it does in March... you could mix it up a bit by using dried cranberries instead of the raisins. In this version I substituted half of the all-purpose flour with whole wheat pastry flour to add a bit of fiber.

Mom's Irish Scawn
Ingredients
  • 4 cups flour (2 cups all-purpose plus 2 cups whole wheat pastry flour)
  • 1 cup sugar
  • 5 t. baking powder
  • 1 t. salt
  • 1 1/2 cup raisins (mini raisins work best)
  • 2 eggs
  • 3/4 - 1 1/2 cups fat free buttermilk
  • 1 T. vanilla extract
  • 1/2 c. granulated or sanding sugar
Directions
  1. Preheat oven to 350 degrees
  2. In a large mixing bowl, mix together the flour, sugar, baking powder, and salt. Add the raisins and mix well.
  3. In a liquid measuring cup, lightly beat the eggs. Add enough buttermilk to bring the total contents up to the 1 cup mark. Add vanilla, then pour into the flour mixture.
  4. Here's the warning about the mixing part... it's not easy. The dough is going to be a bit intense - mix the batter, and add buttermilk gradually so that the mixture is moist but not too moist. Once you've incorporated all of the dry ingredients, you're done. Turn the batter into 2 9x5 loaf pans, or 2 12-muffin muffin tins.
  5. Place into the oven. For the loaves, you'll cook a total of 40-45 minutes, while the muffins will need 25-30 minutes.
  6. Glaze: 5 minutes before the end of baking time, add enough water to the 1/2 cup granulated or sanding sugar to make a relatively thin glaze. Spoon it over the top of the loaves or muffins (about 1 t. per muffin) and put the pans back in the oven to finish baking. Don't worry of the "glaze" seems a bit watery; it'll all bake off.
  7. The scawn is done when a toothpick (or piece of uncooked spaghetti) is inserted and comes out clean. Take the scawn out of the oven and cool. Enjoy!
Nutrition information: Per muffin or slice (assuming 24 slices): 137 cals, 29 g carbs, 2 g fiber, 1 g fat, 3 g protein

Holy Posole!


A few weeks ago I was skiing in Colorado... Aspen, to be specific. Just before heading home, we spent the day in Denver having brunch at Eri's friend Kimmy T's house. On the way there, we stopped by the grocery store to pick up a few things and saw the most beautiful array of chili powders, chilies, and other Mexican spices that we just don't see here on the East Coast. Not in Hull, anyway! Eri, who was traveling with me, had told me she would be the very delighted recipient of a posole recipe from Kimmy's fiance, who is of Mexican descent. So she scooped up some chili powder and hominy, and I did the same, excitedly dreaming of the spicy soup.

Once I got home, I looked at a few recipes, and as I usually do, just made something that "felt" right. I made it once with pork (boneless center cut loin ribs) and once again with chicken breasts. The pork definitely brings a bit more flavor (and more fat), but the chicken tastes quite nice and is a bit lighter. Technically, chicken is used in "green" posole, not red, but what the heck. I'm a gringa. Also, the soup tastes much better on the second day, so I'd advise making it ahead of time to let the flavors really come into their own. You can follow the same recipe with either the pork or the chicken, so here it is...

Posole Soup (serves about 4)
Ingredients
  • 1 lb. boneless skinless chicken breasts (or boneless pork ribs) (you could use boneless or bone-in, just account for the weight of the bone in the total weight)
  • 2 cups low sodium chicken broth plus about 1 cup water
  • 1 bay leaf
  • 2 cloves garlic, minced (or the equivalent in prepared or dried garlic)
  • 1 can hominy, drained (Yeah, I cheated and used a can of Goya hominy. If you have time and interest, you can use dried hominy, soak and cook, but allow an "overnight's" worth of work for that)
  • 1 15-oz. can diced tomatoes with chilies (I used Trader Joe's fire-roasted tomatoes with chilies)
  • Hot chili powder, 1/4 t. to start (I used 1/2 t.)
  • Chipotle powder, 1/4 t. to start (I used 1/2 t.)
  • Oregano, 1 t.
  • Fresh cilantro, 1-3 sprigs
  • 1/2 lime
  • Salt to taste
  • Garnishes: diced avocado, tortilla strips, diced onions, cilantro
Directions
  1. Place the chicken in a saucepan and cover with the broth. Add the bay leaf and garlic. Place a lid on the saucepan and bring to a boil. Cook for about 15 minutes, until the chicken is cooked through.
  2. Remove the chicken from the broth, and strain the broth through a mesh strainer. Return the broth to the saucepan.
  3. Add the spices (chili powders and oregano), tomato, and hominy to the broth. Bring to a simmer.
  4. Shred the chicken using two forks, or your hands (careful, it's probably still hot!) and add it to the soup mixture.
  5. Tear the cilantro and add it to the soup; squeeze the lime juice into the soup, and taste. Adjust seasonings to your taste (you may need to add salt and a bit more chili powder). Try not to add more than 1/8 t. of chili powder at a time - it's very spicy!
  6. Simmer the soup for about 30 minutes, covered, to allow the flavors to blend. Add water or broth if needed.
  7. Top with the toppings of your choice and enjoy!
Nutrition information per serving if made with chicken, about 1.5 cups (for soup only, no toppings included): 236 calories, 2 g fat, 29 g protein, 5 g fiber, 24 g carbs

Wednesday, March 9, 2011

Mardi Gras, one day late

Wow - has it really been three weeks since I last posted? Yikes! Well, a lot has happened. Actually, I was on vacation for one week - the rest of the time I was just too pootered (apparently) to post. The important thing is, I'm back!

I have another recipe to post (Holy Posole!) which I'll save for tomorrow, but today's recipe is an adapted Shrimp Etouffe, partly in honor of Mardi Gras (yes, it was yesterday!) and partially because I had the Holy Trinity (pepper, celery, and onion) in the fridge. So using a few recipes for inspiration, I created this one - the main adjustment I made was to use 1 T. olive oil instead of the 4-8 T. of butter typically called for in these recipes, saving about 700 calories total. I had this with some roasted cauliflower to get a few more veggies in.

Jen's Shrimp Etouffe

Ingredients:
  • 1 bell pepper (red, yellow, green, or orange), cut into chunks
  • 3 medium celery stalks, coarsley chopped
  • 1 medium onion, peeled and quartered
  • 1 T. olive oil
  • 1/4 c. all purpose flour
  • 2 c. chicken broth
  • 1 bay leaf
  • salt and pepper
  • 1/4 t. (or more to taste) cayenne pepper
  • 1 t. Worcestershire sauce
  • 2 garlic cloves, minced
  • 1 t. thyme
  • 1 15-oz. can diced fire-roasted tomatoes with chiles
  • 12 oz. raw shrimp, deveined and peeled
Directions:
  1. Finely chop the celery, onions, and pepper (or pulse in a food processor). Heat olive oil in a saucepan over a medium high heat and add vegetables. Cook, stirring, about 10 minutes or until vegetables soften. Add the flour and stir completely until flour is incorporated. Stir frequently so that it doesn't burn, about 5 minutes, then gradually add the chicken broth, stirring to incorporate each addition. Turn the heat down to a medium-low. Add seasonings and tomatoes, stir to incorporate, cover and simmer for about 20-30 minutes. Stir every few minutes to ensure it's not sticking.
  2. Add the shrimp, stirring to ensure they're incorporated; replace the lid and simmer for 5-7 minutes being careful that the shrimp doesn't overcook. Serve over rice.
Nutrition information per serving: 200 calories, 17g carbs, 5g fat, 21g protein, 2g fiber

Wednesday, February 16, 2011

Quick Weeknight Dinner: Oven-crisp Parmesan Chicken with Roasted Broccoli and Cauliflower


My intentions always start out strong: every morning, I think about what I'll make for dinner (because my mind just works like that). Sometimes the plan will be elaborate, sometimes it'll be simple (like a frozen Kashi pizza). But by the end of the work day, after the commute home, sometimes the last thing I want to do is cook. So I have built up a stable of quick and healthy recipes that taste like they took a little while for days just like that... which happened to be today. Which is how I came to make Oven-crisp Parmesan Chicken with Roasted Broccoli and Cauliflower. I like this dish because:
  • You can do some prepping in advance
  • You can prep pretty quickly
  • You can cook the chicken and the veggies together
  • Oven time is 30 minutes total
  • It's delish!!
Ingredients:
  • Chicken breasts (one per person)
  • Buttermilk, about 1/2 cup
  • Bread crumbs, about 1/3 cup
  • 1/4 t. paprika
  • 2 T. Parmesan
  • 1/2 head fresh cauliflower
  • 1-2 bunches broccoli
  • 1 T. olive oil
  • Salt and pepper
Directions:
(optional prep work: as early as the night before, you can marinate the chicken breasts in the buttermilk in a zip-top bag, or in a covered baking dish. You can also chop the broccoli and cauliflower)
  1. Arrange two racks in your oven so that one is about a third of the way down and the second is a third of the way up. You want to be able to cook the chicken and veggies at the same time. Preheat the oven to 400 degrees.
  2. If you've not pre-marinated the chicken breasts, place them in a shallow baking dish, or a pie plate, and pour the buttermilk over them. Let them soak a couple of minutes.
  3. In another shallow dish, combine the bread crumbs, paprika, and Parmesan cheese. Place this dish directly next to the dish with the chicken.
  4. While the chicken marinates, cut the broccoli and cauliflower into bite-sized pieces and place them in a roasting pan or a 13x9 baking dish coated in cooking spray. Drizzle the vegetables with olive oil and sprinkle with salt and pepper, then toss the vegetables. Place in the oven on the lower rack.
  5. Working with one breast at a time, using tongs or a fork, lift the chicken from the buttermilk and let the excess drip off. Place the chicken into the breadcrumb mixture, then turn to coat the other side. Place the chicken breast in a baking dish coated in cooking spray, preferably one with a rack. Now do the rest! Spritz the chicken breasts with cooking spray before putting the baking dish on the upper rack of the oven. The spray will help the crust crisp up as it bakes.
  6. Bake for 25-30 minutes, until the chicken is cooked through. While the chicken is cooking, every 10 minutes or so, stir the vegetables around. Watch to ensure they're not burning or sticking to their baking dish - if they are then take them out of the oven.
  7. Everything should be done after 30 minutes... remove from the oven and enjoy!
  8. While this is all cooking, why not nuke a sweet potato? It will add some color to your meal, give you some awesome beta carotene and some fiber. It should only take about 6 minutes - poke a medium sweet potato all over with a fork and wrap it in a damp paper towel. Turn it over about three minutes through and shazam! You have a yummy sweet potato.
Nutrition information for the chicken: Per serving (4 oz. each serving): 159 calories, 7 g carbs, 3 g fat, 30 g protein, 1 g fiber

Tuesday, February 15, 2011

Cranberry Oat Pancakes

I was looking for a way to mix up my normal Saturday morning pancakes. Having just made some delicious cranberry oatmeal muffins (aka Yummy Bliss muffins), I thought - why not make some cranberry oatmeal pancakes? I didn't get to take pictures of these pancakes, but will make them again soon, and be sure to post photos from that batch.

I took the basic Saturday Morning Pancake recipe and made the following ingredient modifications:
  • Swap out 1/2 cup oats for 1/2 cup of the flour, so that you use 1/2 cup oats and 1 1/2 cups whole wheat pastry flour
  • Add 3/4 cup fresh cranberries, frozen
  • Use fat free buttermilk instead of reduced fat, to make up for the fat that the oats add
The technique for grinding the oats and chopping the cranberries is exactly as you use them for the Yummy Bliss muffins. I made these changes to the directions:
  • Add the ground oats to the flour
  • Add the sugar to the cranberries as you process them, instead of adding the sugar to the other dry ingredients
  • Add the cranberries to the buttermilk mixture before you combine with the dry ingredients to impart a pinkish hue. If you don't want the pinkish hue, then add the cranberries to the dry ingredients.
Cook as you would the regular pancakes, and enjoy! Here is the nutrition information - you get a little bit more calorie-wise, but you get additional fiber:
Per serving (about 4 pancakes, assuming 24 pancakes from the entire recipe): 223 calories, 40 g carbs, 3 g fat, 10 g protein, 5 g fiber.

Wednesday, February 9, 2011

Sneaky Chili


Lately I haven't been getting enough veggies, and I was trying to think of a more interesting way to get them than green beans. One of my girlfriends who has kids was talking about a cookbook she has that helps parents "sneak" vegetables into kids' foods. So I'm thinking... I'm on a food processor kick (see the Madras Meatballs recipe) and I'm looking for something different to do with veggies. Why not put those together and think of a way to boost the nutrient content of something I love? And hence Sneaky Chili was born! The recipe is built very much in the same way Tasty Turkey Chili was, with similar technique... If you don't like the veggies I've selected, as my sister (who hates peppers and mushrooms) doesn't, use whatever veggies you have on hand that you like.

Sneaky Chili
Serves 4-6

Ingredients
  • 1 lb. ground turkey breast (you can sub veggie crumbles or crumbled tofu)
  • 2 small onions or 1 medium onion
  • 1 T. canola oil
  • 1 T. chili powder
  • 1-2 cloves garlic
  • 1 yellow or red bell pepper
  • 2 carrots
  • 2 parsnips
  • 1 cup mushrooms (pre-sliced or roughly chopped whole ones)
  • 2 T. tomato paste
  • 1/4 c. tomato sauce
  • 1 can (14.5 oz.) diced tomatoes with chiles
Directions
  1. Peel and quarter onion, and mince in a food processor
  2. In a skillet coated with cooking spray, saute the turkey, taking care to break it up into crumbles.
  3. Heat a large saucepan over medium heat; add the olive oil and heat til shimmering. Add the onions and stir. Saute for 2-3 minutes; add tomato paste, chili powder, and garlic. Turn heat to low and cook while you prepare the veggies.
  4. Trim the pepper, carrots, and parsnips and add to the food processor; add the mushrooms. Pulse until vegetables are minced.
  5. Add the vegetables, diced tomatoes, and turkey to the onion-tomato mixture and stir to combine.
  6. Simmer for 30-40 minutes, until the vegetables are all cooked through. Serve over brown rice or a baked sweet potato
Per Serving (assuming 6 servings): 169 calories, 15 g carbs, 3 g fat, 20 g protein, 3 g fiber

Saturday, February 5, 2011

Announcing Recipe Challenge!

So I'm drinking some coffee, getting ready to start the day (which just happens to involve a visit to the spa and a night out with some girlfriends, woohoo!) and I was thinking about what to post today. I have some ideas of things I want to explore and do with this blog, but I wanted to see what would happen if I got some requests from YOU, dear healthy.tasty.easy. readers?

So as of today, I hereby welcome "requests". No request is too small! For example:
  • You're supposed to make something to bring somewhere (or you're hosting) and you don't know what to make
  • You've been making this recipe for years but it has so many calories and so much fat! You need help lightening it up!
  • You bought this freaky vegetable at Whole Foods today because it was on sale, but you don't know what to do with it!
  • And so on...
I will take on the request and see if I can either find or make a recipe to meet the challenge, then post what I come up with, as your "Recipe DJ," if you will.

So, either by commenting on this post, or by emailing info at healthytastyeasy dot com (I'm working on figuring out how to do this as a permanent blog "feature" - expert techies, your help is welcome!). I'm looking forward to seeing what curve balls you send my way!

Off to get this party started...

Yours in healthy.tasty.easiness,
Recipe DJ

Thursday, February 3, 2011

Madras Meatballs


So I just bought my first domain name - healthytastyeasy.com - and that was exciting. It got me to poke around and look at other foodies' blogs. I stumbled across nomnivorous, which I think is a nicely written, personable blog, and saw this recipe for Tikka Masala Meatballs (which in turn was inspired by Big Girls, Small Kitchen and Pretty Girls Use Knives). To me, cooking is about expressing yourself and trying new things. And like nomnivorous, I very seldom follow a recipe exactly. Besides, I typically stay in the European (French, Italian, German, Spanish) and Latin American cuisine genres - very seldom do I experiment with more Asian flavors. So - mainly because I didn't have exactly the same ingredients - I've tweaked the recipe very slightly. Here's my take on the recipe, which I'm calling Madras Meatballs. With some brown rice, the recipe makes four decent sized servings for dinner - but you could get away with six servings if you had a side dish or appetizer.

Ingredients Meatballs
  • 3/4 c. oats
  • 1 medium onion
  • 1 lb. ground turkey breast (you could also use ground chicken breast)
  • 1 egg
  • 1 T. tomato paste
  • 1 t. ginger
  • 2 t. dried cilantro (or chopped fresh - 2 T.)
  • 1 t. salt
  • 2 cloves garlic (or equivalent pre-minced)
  • 1 t. cumin
Sauce
  • 2 medium onions
  • 3 carrots
  • 1 T. canola or other neutral vegetable oil
  • 2 cloves garlic (or equivalent pre-minced)
  • 1 t. cumin
  • 2 t. dried cilantro (or chopped fresh - at least 2 T.)
  • 1 - 2 t. hot curry powder (I used McCormick Hot Madras Curry powder) - use as much as you would like, depending on taste. E's not crazy about heat so I kept it closer to 1 t.
  • 1 1/2 t. ground ginger (you can use fresh if you have it)
  • 1 14.5 oz. can diced tomatoes with chiles (I used Trader Joe's fire roasted tomatoes with chiles)
  • 1 14.5 oz. can diced tomatoes
  • 1/2 c. light coconut milk
Directions
  1. (Note: This recipe works really well if you use a food processor, but it's optional. My directions will assume you're using one.) Turn on your oven's broiler. Line a baking sheet with foil and spray the foil with cooking spray.
  2. Place the oats in the food processor and pulse until they look like coarse flour. Pour the oats into a bowl for now.
  3. Peel and quarter the onion. Place the onions in the food processor and pulse until they are minced.
  4. Add the turkey, the processed oats, the egg, tomato paste, salt and spices to the onion mixture in the food processor. Pulse until all ingredients are incorporated.
  5. You can make the meatballs any size you would like, I made smallish ones using a small cookie dough scoop. You could use an ice cream scoop, spoons, or your bare hands to shape the meatballs.
  6. Place the meatballs on the prepared baking sheet (I ended up with 40 small ones) and cook under the broiler for about 10 minutes, watching to ensure they don't burn.
  7. Wash out the food processor, you'll need it for the sauce! Peel and quarter two onions; remove the ends from the carrots, and peel if you'd like to (I didn't, I just washed them) and cut the carrots into 1-inch chunks. Place the onions and carrots in the food processor and pulse until they are minced. In a skillet, heat 1 T. canola oil over medium-high heat and add the onions and carrots. Add the garlic and other spices, stir to combine, and cook for about 5 minutes to allow the flavors to combine and heat up a bit.
  8. Add both cans of tomatoes and the coconut milk, stir to combine, turn down the heat, cover and simmer for about 10 minutes to allow the flavors to blend. Add the meatballs to the sauce and simmer for another 15 minutes, until the meatballs are cooked through (they should have cooked pretty well under the broiler).
  9. Serve over brown rice (I like to use Trader Joe's microwaveable pre-cooked brown rice). Have some plain yogurt on hand in case you went a little overboard with the spice - it'll help balance that heat.
Per serving: 319 calories, 9 g fat, 29 g carb, 32 g protein, 6 g fiber

Notes on this recipe:
  • If you don't have diced tomatoes with chiles, you can use regular diced tomatoes and add chopped jalapenos, or crushed red pepper, or a pinch of cayenne, or just up the curry powder.
  • If you don't have coconut milk, you could use regular milk, or you could just go all-tomato.
  • You don't have to use diced tomatoes, you can use crushed or whole peeled and break them down yourself.
  • Fresh herbs and spices or dried? Usually 1 t. of a dried herb is about as powerful as 1 T. fresh. Use your taste buds to guide you here.

Wednesday, February 2, 2011

Name these muffins! (now known as Yummy Bliss Muffins)


Those of you who know me "in real life" know that I love to bake muffins. In fact, back in the day when I lived with my BFFs Sun-Sun and Eri, I used to bake muffins all the time. So while pancakes have become the norm on Saturday mornings, Sunday mornings are usually for muffins.

Part of the challenge with muffins is that it's difficult to find a recipe that's under 200 calories per muffin. I don't know about you, but I think that's kind of "expensive" for a muffin. So this past Sunday I wanted to try a new muffin recipe and I wanted one that was under 200 calories. After looking at a couple of recipes for inspiration, I put together these Cranberry Oat muffins. They were so good that it's hard to believe they are 145 calories each, with a respectable 3 grams of fat.

There is one tool that will make this recipe really work well - that's a food processor. My immersion blender has an attachment that acts like a food processor, and that's what I used for this job. If you don't have a food processor, then a blender should do the trick as well - last possible option would be to coarsely chop with a chef's knife - but that's annoying. It's up to you.

E so enjoyed these muffins that he declared that they were "the best muffins I've ever made". That's quite a statement considering the guy has known me for 13 years. And in light of that statement I thought they ought to be called something more exciting than "Cranberry Oat Muffins". So... dear blog followers... what do you think I should name them?

Ingredients
  • 1 c. oats
  • 1 c. whole wheat pastry flour
  • 3/4 c. brown sugar
  • 2 t. baking powder
  • 1 t. baking soda
  • 1/4 t. salt
  • 3/4 c. whole, fresh cranberries plus 2 t. granulated sugar (don't thaw if the berries are frozen)
  • 1 egg
  • 3/4 c. low-fat buttermilk
  • 2 T. canola oil
  • 1 t. pure almond extract
  • 1 t. pure vanilla extract
Directions
  1. Preheat the oven to 400 degrees F. Place muffin cups in a 12-muffin baking pan, and spray with cooking spray
  2. In a food processor or blender, pulse the oats until they are the consistency of a course flour. This should just take a few pulses.
  3. Combine the dry ingredients with a whisk, ensuring that the brown sugar isn't too lumpy.
  4. In the food processor, pulse the cranberries and the sugar (2 t. granulated) just a couple of times, until the berries are coarsely chopped. Toss the cranberries with the dry ingredients to coat them a bit.
  5. In a separate bowl, combine the buttermilk, egg, oil, and extracts. Add to the flour mixture and stir until the ingredients are just combined. Remember, like with the pancakes, you don't want to over-mix or the muffins will be heavy and chewy.
  6. Evenly distribute the batter into the muffin cups - I like to use an ice cream scoop to help me do this.
  7. Bake the muffins for 15-18 minutes; start to test after 15 minutes by inserting a toothpick (or wooden skewer or even a piece of uncooked spaghetti) into the muffin; if it's dry or has just small crumbs sticking to it when you remove it, the muffins are done. Take the muffins out of the pan and cool on a wire rack.
Per muffin: 145 calories, 26 g carbs, 3 g fat, 3 g protein, 2 g fiber

These muffins are really yummy with almond butter or peanut butter - they make a great pre-workout snack (or, as I like to call it, "first breakfast").

Saturday, January 29, 2011

Saturday Morning Pancakes

Everyone has their weekend rituals. For E and me, one ritual we have is Saturday morning pancakes. Typically this involves my going downstairs first, putting on a pot of coffee and cleaning the kitchen (depending on how much cleaning up we didn't do from Friday night's dinner - if it's been a long week and there was a martini involved, chances are no dishes got done on Friday night), then getting pancakes going - and E finally comes downstairs after everything has been magically cleaned and the pancakes are nearly done. His sense of timing is quite remarkable in this regard.

Anyway, I have a pancake recipe that's now committed to memory, which I love to make - it's easy and tasty and, of course, healthy (sensing a pattern yet?). I'll make it with pumpkin and spices during the fall and sometimes into the winter, and with applesauce the rest of the time. I love topping these pancakes with no-sugar-added pumpkin butter and pure maple syrup (2 T does the trick) as I have given up artificial and processed foods - I used to be a SF syrup junkie!

Here's the recipe... it turns out best if you have a cup of coffee to keep you company as you cook.

Oh - and I've written this recipe for people who may not make pancakes that often, so it has a lot of guidance. If you're an expert pancake maker and are just interested in the recipe, well, you know what to do.

Saturday Morning Pancakes (makes 24 pancakes, 4 pancakes per serving)
  • 2 c. whole wheat pastry flour
  • 2 T. granulated sugar or evaporated cane juice
  • 2 t. baking powder
  • 1 t. baking soda
  • 1 t. cinnamon or pumpkin pie spice (optional)
  • 1/2 t. salt
  • 2 1/2 c. low-fat or fat free buttermilk
  • 2 eggs
  • 1/2 c. pureed pumpkin or 1/3 c. unsweetened applesauce
  • Optional add-ins: fresh blueberries, dried cranberries, chocolate chips
**Pre-heat an electric griddle to 350 degrees, or one of those stove-top grill pan / griddles over medium-high heat. I don't recommend using a skillet as you can only make 2 or 3 pancakes at a time and it will take forever!
1. Whisk together the flour, sugar, baking powder, baking soda, and salt in a large mixing bowl
2. In a medium mixing bowl (or a 4-cup measuring glass if you hate doing dishes as much as I do), whisk together the buttermilk, eggs, and pumpkin (or applesauce)
3. Add the buttermilk mixture to the flour mixture and stir gently until combined. It's important that you NOT over-mix or the resulting pancakes will be flat and sad, and nobody wants that. The batter will look a little bit lumpy, and you will see some bubbles start to form as the baking soda and powder begin to react with the buttermilk. Let the batter sit for a few moments before you start making pancakes.
4. Now, make the pancakes.
  • I've found that using a 1/4 cup dry measuring cup to pour the batter works well - you end up with evenly sized pancakes at just about the right size. Spray the skillet with a little cooking spray (canola oil is best) and dab any excess with paper towel.
  • Using the measuring cup, pour the batter onto the skillet, evenly spacing each pancake - you want about half an inch between them. My skillet fits eight pancakes (2 rows of 4). Bubbles will start to appear on the surface of the pancakes.
  • When the edges of each pancake look like they're cooked, and the bubbles have slowed / stopped - this should take about 2-3 minutes - it's time to flip the pancake.
  • This is the fun part - and the part that takes practice if you're a pancake novice. Just trust that it will work, and it will - if you get too nervous, you'll psych yourself out, the pancakes and the spatula will sense this, and they'll flop. Take a spatula and with confident, quick, movement, slide it under the pancake. Again, with confident, quick, movement, flip your wrist so that you put the pancake back on the griddle on its other, uncooked side. Smile at your mad pancake flipping skills, but briefly - you've got 7 other pancakes to flip.
  • Take a moment to observe the color of the pancakes - do they look golden brown? A bit too dark? Not dark enough? Adjust the cooking time if necessary.
  • After you've flipped all of the pancakes, they'll need another 1 or 2 minutes before they can be removed and the next batch of batter can be cooked.
  • You can tell if the pancakes are done in a couple of ways: Lift the edge of a pancake with the spatula and have a peek - is it golden brown? Then it's ready. You can also poke the top of the pancake with your finger - if the surface springs back, it's ready. If not, leave it for a while longer.
  • I like to put the finished pancakes on a large platter that sits underneath the griddle to keep them warm - you can also keep an oven-proof platter in the oven at about 200 degrees, and put the finished pancakes in there until all of the batter is cooked.
  • Nutrition information per serving (about 4 pancakes): 186 calories, 33 g carbs, 3 g fat, 3 g fiber, 10 g protein
Recipe Notes
  • Buttermilk: If you don't have buttermilk, you can use regular milk - just reduce the amount to 2 cups. You can also add plain yogurt to milk to thicken it up, or you can add 2 T. lemon juice or apple cider vinegar to the milk and let it sit to thicken for a moment.
  • Applesauce vs. pumpkin: I've found that you need less applesauce than pumpkin, as the pumpkin is a bit thicker. If you're opening a new can of pumpkin for the pancakes, freeze the rest in 1/2 cup portions so you can thaw just what you need for the next batch. Or, make some pumpkin muffins with the rest. If you're not someone who eats a lot of applesauce (like me) I've found that the applesauce cups are a great way to buy applesauce for baking - they come in 1/2 cup portions and you don't end up opening a whole jar that will likely go to waste.

Thursday, January 27, 2011

Recipe update: dark chocolate brownies

So - last night we had some turkey chili to try and ward off Snow Fatigue... after shoveling snow today for about an hour (E's forearm is still hurt from the spill he took on some ice last week, so I was shoveling solo) I thought about how it would be nice to be someplace warm. Where they have nice, spicy food. And ice cold beer. And nice, spicy food. Ooops, I said that already.

Anyway, when I posted the Dark Chocolate Brownie recipe, I had said I wanted to try them with chipotle, so I thought that today would be the perfect day to do that. I also wanted to see if I could cut the fat - and keep / increase the moisture - by replacing the canola oil with reduced fat buttermilk. I also happened to have dark chocolate on hand, so instead of the substitution I made last time (cocoa powder, canola oil, and sugar), I used the chocolate.

The resulting flavor is nice - the cinnamon really comes out, and the heat is slow to build. You don't taste the chipotle right away, rather it builds with every bite. My suggestion for serving these brownies would be topped with a scoop of either vanilla or dulce de leche ice cream, drizzled with Kahlua, and sprinkled with cinnamon sugar. If you use just a small scoop of ice cream, you're not adding too many calories. Next variation will be to bake these with the Mexican spices, but add some coconut. I'll also try ratcheting up the chipotle, as these could have been a bit spicier.

Oh - and a note on moisture... I think that unless you're using the usual amount of butter called for in brownies, you're going to have a cakier brownie. Delicious, but cakey and crumbly. E said that these brownies were more delicious than the "original". In his taste buds I trust!

So - here is the revised ingredient list; follow the directions as before:

* 8 ounces dark chocolate (chips or broken into pieces)
* 2 tablespoons unsalted butter
* 1 cup whole wheat pastry flour
* 1/4 cup unsweetened Dutch process cocoa powder (from Nuts Online)
* 1/4 teaspoon salt
* 2 teaspoon cinnamon
* 3/4 teaspoon chipotle powder (less or more to taste)
* 1/4 teaspoon baking soda
* 4 large eggs
* 1 cup packed dark brown sugar
* 1/2 cup plain nonfat Greek yogurt (I used Chobani)
* 1/4 cup buttermilk (substitution for canola oil)
* 2 teaspoons vanilla extract

Per brownie (assuming 24): 119 calories, 19g carbs, 5g fat, 3g protein, and 2g fiber (savings of 3g fat and 30 calories per brownie from the "other" recipe)

Wednesday, January 26, 2011

Fight Snow Fatigue with Tasty Tukey Chili


So, we're supposed to get more snow tonight. Yay. I wanted to eat something for dinner that was warm - both temperature warm and spicy warm. Something with a kick!

I got some new spices, which also helped to inspire me, from Penzeys Spice: a chili powder, some cumin, and some chipotle powder, which I was dying to try. To bring the flavors out, I took some inspiration from a Cooks Illustrated Texas Chili recipe which called for cooking the spices with the onions and some tomato paste at the beginning, for about 10 minutes, before adding the meat and beans. I also cooked the ground turkey separately to make it easier to leave any fat behind. To add more depth of flavor, I used diced tomatoes with chiles and tomato sauce (you could save some calories by using chicken broth instead of the tomato sauce; chicken broth also results in a less "intense" tomato flavor).

Here's the recipe - it makes 4 generous servings, 6 smaller sized servings.
* 1 lb. ground turkey (I used Nature's Promise)
* 1 T. olive oil
* 1 medium yellow onion (or two small), peeled and diced
* 2 garlic cloves, minced or crushed, or the equivalent
* 2 T. tomato paste
* 1 15-oz. can diced tomatoes with chiles (I used Trader Joe's)
* 1 15-oz. can light or dark kidney beans, or beans of your choice, drained
* 1 c. tomato sauce or puree
* 1 red, yellow, or orange bell pepper, diced or chopped into small pieces
* 1 T. chili powder, such as Penzeys Spices Chili 9000
* 1/2 t. ground cumin
* 1/2 t. ground chipotle powder (lends a spicy smokiness - use 1/2 t. additional chili powder if you don't have chipotle)
* salt and pepper to taste

1. In a skillet coated in cooking spray over medium heat, saute the ground turkey until cooked through, breaking it as it cooks into small pieces

2. While the turkey cooks, heat 1 T. olive oil in a saucepan; add the onions and garlic and stir to combine. Cook for about 2 minutes.
3. Add the tomato paste and the spices to the onion mixture, stir to combine, lower the heat and cook for about 10 minutes. Stir periodically to ensure it doesn't stick to the pan or burn.
4. Add the diced tomatoes, tomato sauce, bell pepper, turkey, and beans to the tomato and onion mixture, and stir to combine. Cover and simmer over low to medium heat for about 25 minutes, stirring occasionally, until the peppers are cooked through.

Serve over brown rice or a multi-grain pilaf topped with sour cream, shredded cheese, cubed avocado, or your favorite chili toppings.

Per serving (4 generous servings): 357 calories, 11 g fat, 35 g protein, 33 g carbs, and 8 g fiber

Monday, January 17, 2011

Pork Tenderloin Medallions with Red and Yellow Peppers


This is a really easy recipe that tastes much more delicious than the time you put into it. It's doable for a weeknight after work, and it's yummy enough to serve for company. Serve it with mashed potatoes, roasted potatoes, butternut squash, or your favorite starch. The original recipe called for rosemary, which I don't like, so I substituted thyme and it tasted just delightful.

Yield: 4 servings (serving size: 3 ounces pork and about 1/2 cup bell pepper mixture)

Ingredients

* 1 (1-pound) pork tenderloin, trimmed and cut crosswise into 1-inch-thick medallions
* 1/2 teaspoon kosher salt
* 1/2 teaspoon freshly ground black pepper
* 1 tablespoon extra-virgin olive oil
* 1 1/2 teaspoons dried thyme
* 3 garlic cloves, thinly sliced
* 1 red bell pepper, cut into 1 1/2-inch strips
* 1 yellow bell pepper, cut into 1 1/2-inch strips
* 2 teaspoons balsamic vinegar

Preparation
1. Heat a large skillet over medium-high heat. Sprinkle pork with salt and pepper. Add oil to pan; swirl to coat. Add pork to pan; cook for 5 minutes. Reduce heat to medium; turn pork over. Add thyme, garlic, and bell peppers; cook 7 minutes or until peppers are tender and pork is done. Drizzle with vinegar.

Per serving: 215 calories, 10g fat, 25g protein, 5g carbohydrates, 2g fiber

Tuesday, January 11, 2011

Chicken Pot Pie Stew with Drop Biscuits


Just before we got the Blizzard here in Massachusetts earlier this week, I started craving warm comfort food. I also want to make something delicious for E, because isn't the way to every man's heart through his stomach? Sure, I know I have his heart, but I like to spoil him - especially when he's traveling. I saw America's Test Kitchen over the weekend - one of my favorite cooking shows ever - and they did a segment on "the perfect" chicken pot pie. The key, they said, was to cook the ingredients separately before joining them together, to allow each one to develop its own personality and flavor. Makes sense to me.

I didn't want to "spend" a lot of calories on the crust, and I also wanted to save a little time on preparation, so decided to try this as a stew with quick drop biscuits.

The stew recipe is inspired by ATK and Martha. The biscuit recipe is from Cooking Light.

Chicken Pot Pie Stew (Serves 4)
  • Boneless, skinless chicken breasts (about 1 pound)
  • Chicken broth (enough to just cover chicken breasts)
  • 1/2 c. Dry white wine
  • 1/4 c. all-purpose flour
  • 2 T. olive oil
  • 4 carrots, peeled and sliced 1/4 inch thick
  • 2 onions, chopped
  • Salt and pepper to taste
  • 1 t. dried thyme
  • Low fat milk (about 1 1/2 cups)
Directions
- Preheat the oven to 400 degrees.
- Poach the chicken breasts in the broth - cover the breasts in broth, and bring to a boil. Cook about 10 minutes, until breasts are fully cooked through. Remove breasts from poaching liquid and transfer to a cutting board to cool. Strain the poaching liquid into a 4-cup measuring cup, ensuring you add no more than 1 cup of poaching broth. Add the wine to the measuring cup. Add enough milk to bring the total amount of the liquid to 2 1/2 cups.
- When it is cool enough to handle, shred the chicken using two forks.
- Heat the olive oil in a saucepan over medium heat. Saute the onions and carrots in the olive oil with the thyme until the carrots are tender; add salt and pepper to taste.
- Add the flour to the onion / carrot mixture and stir for about 1 minute.
- Add the liquid to the pan gradually, stirring as you add it, and cook it, stirring, until it thickens.
- When the sauce has thickened, remove the pot from the heat and stir in the peas and the chicken. Pour the mixture into a casserole dish, and bake for about 20 minutes, or until it bubbles around the edges.

Per Serving: 272 calories, 20g carbohydrates, 6g fat, 30g protein, 3g fiber

Drop Biscuits
  • 2 cups all-purpose flour
  • 1 tablespoon baking powder
  • 1 teaspoon sugar
  • 1/2 teaspoon salt
  • 1/4 cup chilled butter, cut into small pieces
  • 1 cup fat-free milk
  • Cooking spray
Directions
- Preheat oven to 450ยบ.
- Lightly spoon flour into dry measuring cups; level with a knife. Combine flour, baking powder, sugar, and salt in a bowl; cut in butter with a pastry blender or 2 knives** until mixture resembles coarse meal. Add milk; stir just until moist.
- Spoon the batter into 12 muffin cups coated with cooking spray. Bake at 450° for 12 minutes or until golden. Remove biscuits from pan immediately, and place on a wire rack.

**after trying to use two knives, I tried an apple corer / slicer and found that it works as well as a pastry blender!

Per biscuit: 119 calories, 17g carbohydrates, 4g fat, 3g protein, .5g fiber

Bring it all together
Use pasta dishes or plates with rims to serve. Slice one biscuit (or two!) in half and spoon one fourth of the stew over it. Enjoy!

Kitchen tools I can't live without

I believe that for the most part, you shouldn't have any "one trick ponies" in your kitchen - every tool that you have should be able to serve at least a couple of different roles, with a couple of exceptions (citrus reamer comes to mind). With that said, here's a list of tools that I can't imagine not having in my kitchen:
  • Digital kitchen scale - this is the one scale I love to have around! It's a must for accuracy in portion control. Eri gave me one for my birthday last year and it's hands down, my favorite and most used kitchen tool!
  • Salad spinner - this one does double duty on lettuces and fresh herbs, taking the once onerous and tedious task of washing your lettuce and making it fun. That's right, fun.
  • Kitchen Aid stand mixer - I have the "lowly" Artisan model (my sister has the bigger, better model), but this is my prized kitchen possession. I have the citrus juicer attachment as well as the shredder / slicer attachment, and these both make life so easy - especially when you don't want to drag the Cuisinart out. The attachments are so easy to clean, too!
  • Parchment paper - no, it's not "green" per se, though you can buy recycled parchment paper, but this makes cleanup very easy. I use it when baking cookies and anything else that tends to make a mess on baking sheets.
  • Kitchen gloves - these are disposable rubber gloves that you can use when dealing with smelly or gross food (think onions, garlic, raw meat and seafood, etc.). They help keep your hands clean, and keep them from retaining smells that are hard to get rid of.
  • Electric griddle - OK, I use this only for pancakes, but I like it better than the stove top griddle because a) it's got a larger surface area, b) it holds heat more evenly, and c) I can control the temperature by selecting it on the dial, instead of checking my front and back burners to see that the flames are about even.
  • Wooden spoons - there's just something nice about using a wooden spoon instead of a plastic or metal one. I feel like I'm "connecting" better with the food that I'm making when I use a wooden spoon: it's not going to bend like a plastic one, and it's not going to scratch your bowls like a metal one.
  • Nonstick skillet - this is used for frying eggs, sauteing onions, making shrimp arrabbiata, and so much more. The trick to keeping the nonstick skillet nonstick is to ensure you're not scrubbing it with anything too scratchy. If something does happen to stick to it, soak the skillet until the food can be removed easily with a rubber spatula.
  • Meat thermometer - sure, you can use your senses of touch and sight to tell whether meat has cooked properly, but wouldn't you like to know for sure?
  • Rubber spatula / spoonula - I love that I'm not leaving too much behind in the baking dish or the mixing bowl, because the spatula will scrape it all up. The one I use most now was a giftie from my BFF Eri, so I'm not sure who made it, but I absolutely love it.
  • Immersion blender - this one is excellent for those of us who want the results of a blender or food processor for soups / sauces, but hate to clean. They're pretty inexpensive, too! Mine has a cute little attachment that you can use to chop and nearly pulverize things like nuts or frozen cranberries!

Friday, January 7, 2011

Where I shop for healthy food

I have a few favorites that I frequent for my grocery shopping and healthy ingredient pantry stocking:
  • Stop & Shop (local to the New England area, a "sister" chain to Giant in the mid-Atlantic). S&S is the grocery store I grew up with, and they've done a nice job in the past couple of years of introducing more and more natural and organic products. This has culminated in the launch of the "Nature's Promise" line of products, natural and organic foods that are bottom line-friendly. As always, read the labels to ensure that the ingredients and the calories are bottom-friendly, but Nature's Promise is my go-to brand within S&S. Fave S&S / Nature's Promise products: eggs, baby carrots, chicken broth, frozen veggies.
  • Trader Joe's. TJ's has a ton of unique and interesting products you just won't find in "regular" grocery stores. They also have great prices on spices and herbs, and a wonderful selection of nuts and dried fruits. Their product offerings change with the seasons, so go often! Fave TJ's products: multigrain english muffins, Fair Trade Morning Blend coffee, pre-cooked frozen brown rice, olive oil.
  • Whole Foods. A lot of my friends call this store "Whole Paycheck" - and with good reason! But when WF has sales, they're often really good ($0.39 / lb butternut squash is a recent good one!). And their prices for the "mainstream" organic food like Kashi and Amy's are usually better than you'd find at a "regular" grocery store. Their prepared food section is also quite nice. I always order my Thanksgiving turkey from WF and have always been happy with the quality. Fave WF products: Amy's breakfast scramble wrap, anything from the cheese section, Greens + bars, Bell & Evans chicken.
  • Nuts Online (www.nutsonline.com). I love, love, LOVE Nuts Online. They have a wonderful selection of coffee, baking supplies, spices, nuts, dried fruits, snacks, etc. I've gotten wonderful gift baskets and custom snack mixes from them and everyone raves about the quality. They're always adding new products and often offer free shipping or other savings for their customers. Fave NO products: Copenhagen coffee, organic whole wheat pastry flour, organic raw cacao powder, Southern Heat Snack Mix, dried whole cranberries.

healthy.tasty.easy. Kitchen Staples

While for most recipes you'll want to have fresh ingredients on hand (meats, vegetables, dairy), there are several key ingredients you can keep in the pantry or freezer which will make preparing healthy food quickly an easy task.

Pantry
  • Canned beans (pinto, garbanzo, black, cannelini)
  • Canned tuna (packed in water)
  • Rice (brown, long grain, medium grain)
  • Canned tomatoes (diced with or without chiles, crushed, whole, tomato paste)
  • Broth (chicken, beef, vegetable)
  • Pasta (whole wheat spaghetti, linguine, ziti)
  • Spices: cinnamon, chipotle, cayenne, ginger, nutmeg, vanilla beans and vanilla extract
  • Herbs: basil, sage, thyme, tarragon, oregano
  • Salt, baking soda, baking powder
  • Whole wheat pastry flour
  • Sugar: organic granulated sugar, light brown sugar, dark brown sugar
  • Cocoa powder and chocolate chips
Fridge
  • Minced garlic
  • Yogurt: fat-free or low-fat Greek yogurt
  • Eggs (eggs actually keep for quite a while)
  • Lemon juice or lemons
  • Buttermilk
Freezer
  • Pre-cooked rice (from Trader Joe's)
  • Chicken breasts
  • Ground turkey
  • Frozen veggies: green beans, pre-cut peppers, peas

Dark Chocolate Brownies


Yesterday, a recipe for dark chocolate brownies popped up on my Facebook news feed. The recipe was from Ellie Krieger, the healthy cooking chef from Food Network, and Paula Deen and Ina Garten's caloric opposite. I decided to make them, but on further inspection of my pantry I had to make a few adjustments. So here is the recipe with my adjustments. The result is a cake-y, moist, not-too-sweet brownie with a nice chocolate flavor. The cinnamon gives it a nice flavor dimension. You can save calories by omitting the walnuts, though they don't add too much fat - and provide Omega-3 fatty acids which are good for you!

The recipe makes 24 brownies, each with 142 calories, 8g fat, 15g carb, 3g protein, and 2g fiber.

* 80 g (3/4 c) raw cacao powder (from Nuts Online), plus 1/4 c. canola oil and 1/2 c. granulated sugar (this was a substitute for 8 oz. bittersweet chocolate, which I did not have on hand)
* 2 tablespoons unsalted butter
* 1 cup whole wheat pastry flour
* 1/4 cup unsweetened Dutch process cocoa powder (from Nuts Online)
* 1/4 teaspoon salt
* 1/2 teaspoon cinnamon
* 1/4 teaspoon baking soda
* 4 large eggs
* 1 cup packed dark brown sugar
* 1/2 cup plain 2% Greek yogurt (I used Chobani)
* 1/4 cup canola oil
* 2 teaspoons vanilla extract
* 1/2 cup walnuts

Directions:
Preheat the oven to 350 degrees. Coat a 9 x 13inch baking pan with cooking spray.

Combine the cacao powder, granulated sugar, 1/4 c. canola oil, and butter in a double boiler or heatproof bowl set over a pot of barely simmering water, stirring occasionally, until butter is melted and mixture comes together.

In a medium bowl, whisk together the flour, Dutch process cocoa, salt, cinnamon, and baking soda.

In a large bowl whisk the eggs and sugar until smooth. Add the yogurt, 1/4 c. canola oil and vanilla and whisk to combine. Add the cacao-butter mixture to this and whisk until blended. Add the flour mixture to this and mix until just moistened.

Transfer the mixture to the prepared pan and sprinkle with nuts. Bake for 20-25 minutes, until a wooden toothpick inserted in the center comes out with a few moist crumbs. Cool completely in the pan on a wire rack. Cut into 24 squares.

Serving size: 1 square

Notes on this recipe:
* Whole wheat pastry flour: I used Bob's Red Mill flour, which you can find in the natural foods section of most grocery stores, or at Whole Foods. You can also order this from Nuts Online, which is where I source a lot of my ingredients.
* Bittersweet chocolate vs. Cocoa / Cacao: According to joyofbaking.com, if you don't have bittersweet chocolate, you can substitute unsweetened chocolate and sugar at the ratio of 1/2 oz. cocoa plus 1 T. granulated sugar for every 1 oz. bittersweet chocolate. If you don't have unsweetened chocolate, you can substitute 3 T. (20 g) cocoa powder plus 1 T. melted butter or oil for every 1 oz. of unsweetened chocolate you need.
* Brown sugar: I used dark brown sugar in this recipe, although the original called for light brown sugar, in an attempt to deepen the flavor a bit.
* Yogurt: The original recipe called for "low-fat yogurt" but I used low-fat Greek yogurt. What's different about Greek yogurt? It has a thicker, less watery consistency which I thought would contribute to a thicker, denser brownie.
* Cinnamon: The original recipe didn't call for cinnamon at all, but I added this to lend a bit more depth of flavor. Next time I'll try a "wicked" brownie by adding chipotle and cayenne pepper in along with the cinnamon.